Want to track exactly what your logged-in users are doing on your WordPress site?
With accurate WordPress user activity tracking, you can easily see what logged-in users are doing and which device they use to access your site.
In this guide, I’ll show you how to track WordPress user activity using MonsterInsights, the best plugin for connecting your WordPress site to Google Analytics.
Before we start, let’s get to the bottom of what WordPress user activity actually is.
What Is WordPress User Activity?
WordPress user activity tracking shows what logged-in users do on your site, like editing content, logging in, or making purchases. It helps you understand behavior, fix issues faster, and personalize user experiences.
WordPress tracks some of this automatically through the activity log, where you can see when someone logged in, what changes they made, and even their IP address. If you’re running a membership site, online store, or forum, this kind of user behavior tracking can help you stay informed and spot issues quickly.
You can also use a plugin to extend the default tracking and see even more detailed activity, especially when combined with tools like Google Analytics.
WordPress User Activity Helps Track Data Accurately
When you enable WordPress user ID tracking, Google Analytics can follow real users across devices, not just anonymous sessions.
Normally, Analytics assigns each visitor a Client ID, which changes if they switch devices or clear cookies. That makes it hard to track the full customer journey.
But with User ID tracking, each logged-in user gets a consistent identifier. That way, you can see the same person move from mobile to desktop, start with a click from a Facebook ad, and finish by making a purchase, all tied together in one report.
WordPress User Activity Helps Tailor User Experience
Tracking what users do on your WordPress site lets you respond in a more personal way.
For example, if someone logs in, adds products to their cart, but never checks out, you can follow up with a discount or reminder email.
You can also use that behavior data to show targeted product suggestions or highlight features based on what they’ve viewed before. This kind of logged-in user tracking helps turn visits into conversions by meeting people where they are in their journey.
How to Easily Track WordPress User Activity
To track logged-in WordPress users by ID in Google Analytics, I recommend using MonsterInsights.
It connects your WordPress site to GA4 and makes it easy to replace anonymous tracking with real user IDs, so you can monitor user behavior more accurately and see the full picture across sessions and devices.
What’s more, it integrates with popular membership plugins like MemberPress to better track and manage your registered users.
Note: MonserInsights offers a free version. For this guide, we’ll use the premium version, which has more advanced features than the free plugin.
Follow the steps below to enable user activity tracking for WordPress using MonsterInsights.
1. Install and Connect MonsterInsights
Start by installing and activating the MonsterInsights plugin on your WordPress site.

Not sure how to do that? Just follow this guide on how to install a WordPress plugin, it only takes a minute.
Once it’s installed, you’ll connect your WordPress site to Google Analytics.
In your dashboard, go to Insights » Settings, then click Connect MonsterInsights under the Google Authentication section.

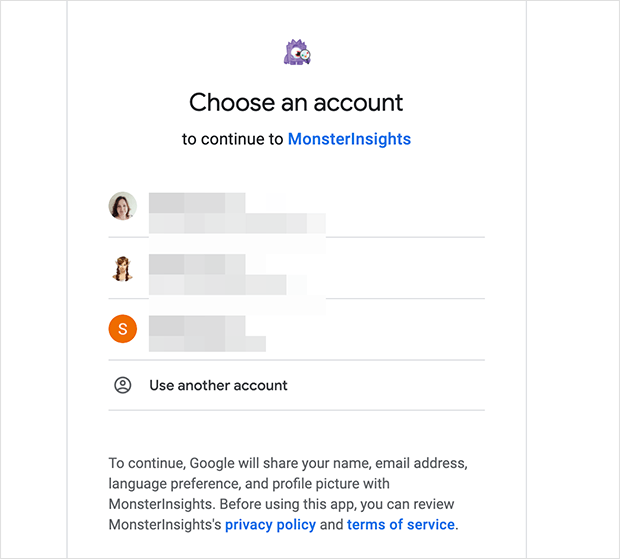
Next, choose the Google account you’d like to connect.

Click the Allow button to give MonsterInsights access to your Google Analytics data.

Then choose the website property you want to track and click Complete Connection.

That’s it for the initial setup. Now you’re ready to enable user tracking.
2. Activate User Tracking in MonsterInsights
First, make sure the eCommerce addon is installed and activated in MonsterInsights.
Go to Insights » Addons in your dashboard, find the eCommerce addon, then click Install and Activate.

Next, go back to Insights » Settings and open the eCommerce tab at the top.

Scroll down to the User ID Tracking section and toggle Enable User ID Tracking to the on position.

Don’t forget to click Save Changes at the top of the page. User tracking is now active in MonsterInsights.
3. Enable User Tracking in Google Analytics
Now that user tracking is active in MonsterInsights, the next step is to turn on User ID tracking in Google Analytics and create a dedicated reporting view.
Log in to your Google Analytics account and choose the property for your website.

Click the Admin button at the bottom-left corner of the screen.

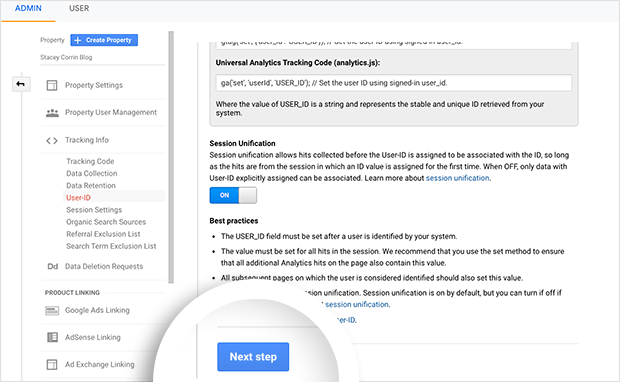
Under the Property column, click Tracking Info, then choose User-ID.

When the User-ID Policy appears, turn the switch to ON, then click Next Step.

Keep clicking Next Step until you reach the end of the setup process.

Click Create to generate the new User ID view.

Give your new view a name, something like “User ID View”, so you’ll recognize it later.
Then turn on the Show User ID Reports toggle and click Create View.


Google Analytics will confirm that your new view has been created. You’re now ready to start collecting WordPress user activity data.
Finding WordPress User Activity Reports in Google Analytics
Once you’ve set up User ID tracking, Google Analytics will begin collecting WordPress user activity data. Just keep in mind—it can take up to 24 hours to start seeing new data, and it won’t include anything from before tracking was enabled.
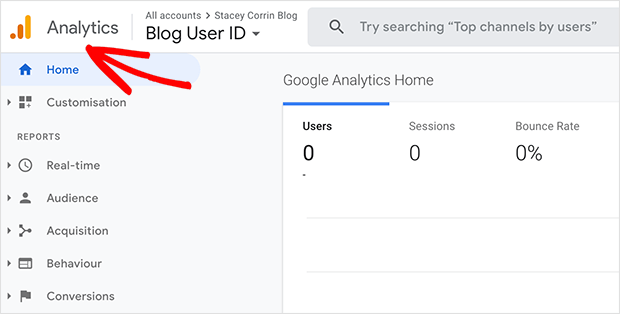
To view your reports, click the Google Analytics logo at the top of your screen.

Then choose the User ID view you created earlier.

You’ll now see a list of users tied to their WordPress User IDs.

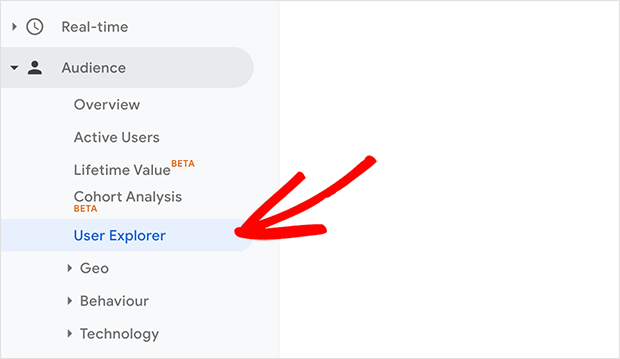
Click Audience » User Explorer to explore individual user activity reports.

Clicking a User ID reveals session details—like pageviews, goals, and purchase behavior—so you can better understand how people use your site.

If you want to match a specific User ID to a WordPress account, go to Users » All Users in your WordPress dashboard.
Hover over any user to view the URL at the bottom of your browser. You’ll see something like user_id=3 — that number is their WordPress user ID.

You can also click Edit on any user to see the same user ID number in your browser’s address bar.

Prefer a Simpler GA4 Dashboard?
If GA4 feels too complex, you’re not alone. I’ve tested OnePageGA, and it makes it way easier to read your reports.
It gives you a clean, one-page dashboard that shows the most important user activity stats—like sessions, conversions, and engagement—without digging through endless menus.

No more bouncing between reports or struggling with filters—just simple, actionable data you can use.
Try OnePageGA free for 14 days and see your user behavior more clearly.
You’re All Set to Track WordPress User Activity
Now you know how to track logged-in user activity in WordPress using MonsterInsights and Google Analytics. This setup lets you understand real user behavior across devices—and use that data to make better decisions for your site.
If you want to keep improving the user experience, check out our guide on how to customize your WordPress login page—another great way to tailor your site for your audience.
And for more beginner-friendly tutorials, follow us on Facebook and Twitter.


